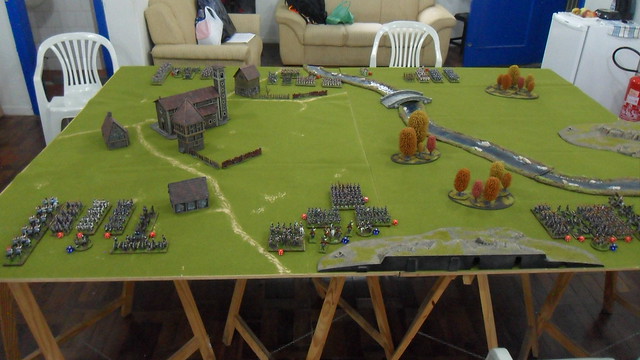
The british started off by following the traditional Wellington's approach of cautious defensive maneuvering. The centre was kept standing by, while the flanks would advance at slow pace.
The french were all about attacking. The right flank was confident in being able to swiftly overcome the unreliable iberian brigade, while the centre was advancing in attack columns towards the british lines, despite the heavy fire from the english guns.
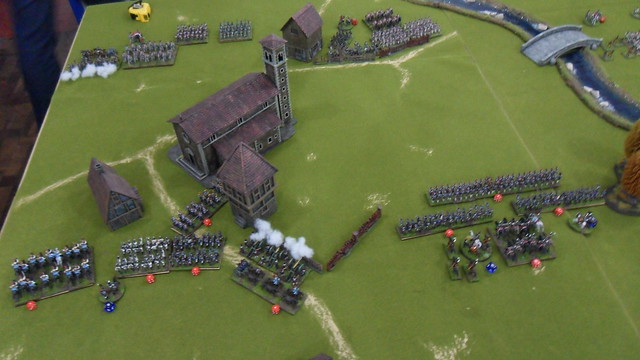
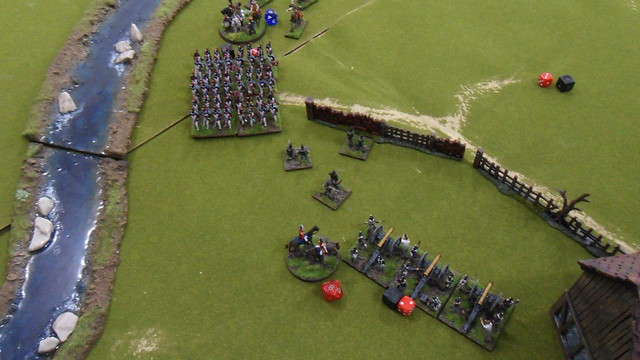
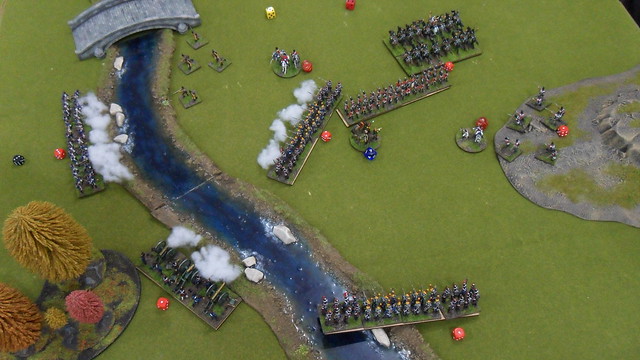
In the french left flank, the town in the middle of the field would prove a challenge for maneuvering units, and so the advance was to be severely obstructed there.
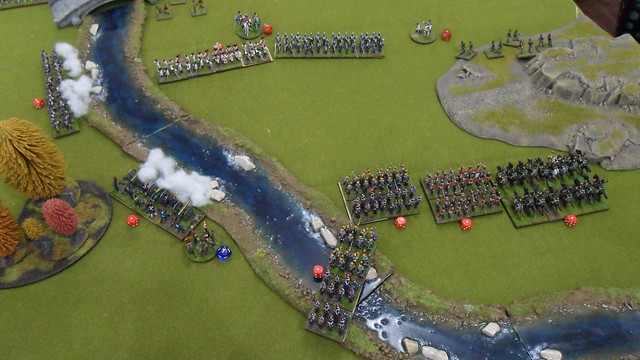
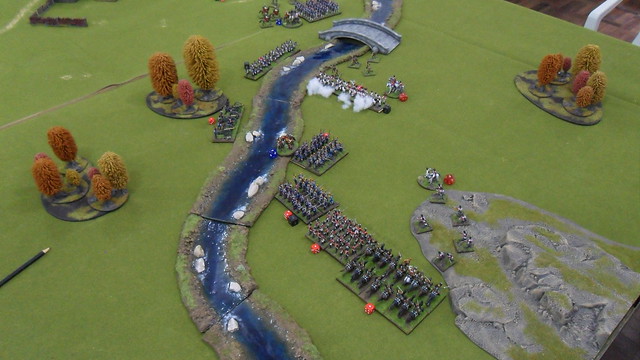
The river was of shallow waters, and we it treated as rough ground for rules purposes, forcing units to move at half pace. This was delaying the french advance more than expected, and so the brigade commander decided to send part of its forces to flank the enemy along the river banks, instead of crossing it.
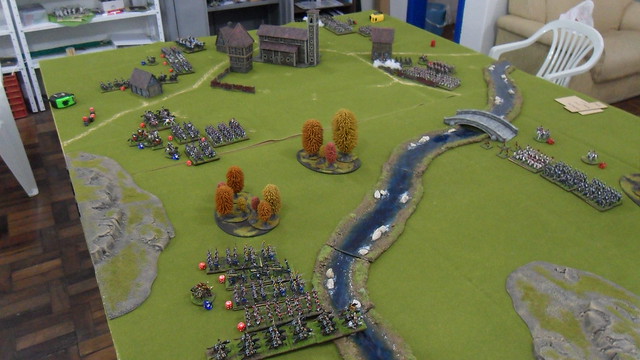
Meanwhile, the french horse artillery from the first brigade was positioned to support the advance of the french centre, while the rest of the french left flank was trying to keep order and advance into the town, under heavy fire from british guns.
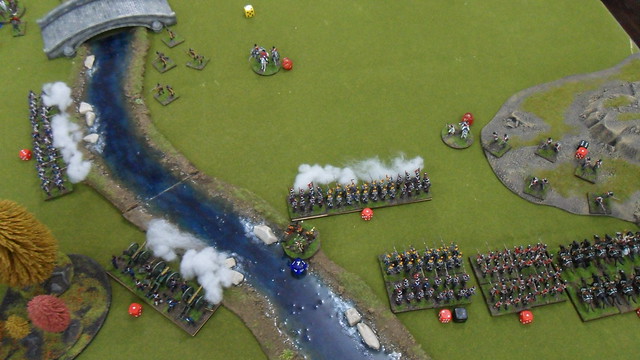
The firing on the british left flank intensifies as the french units on the opposite river bank position themselves to put their muskets to use. The Duke of Wellington himself tries to keep the spanish and portuguese in good order, and deploy them in lines to face the approaching french columns, that by now have succeeded in crossing the river.
The young portuguese general is left to command only a portuguese regiment sent to climb a rocky hill on the far left, and unleash skirmish fire on the french dragoons, in hopes of delaying their march.
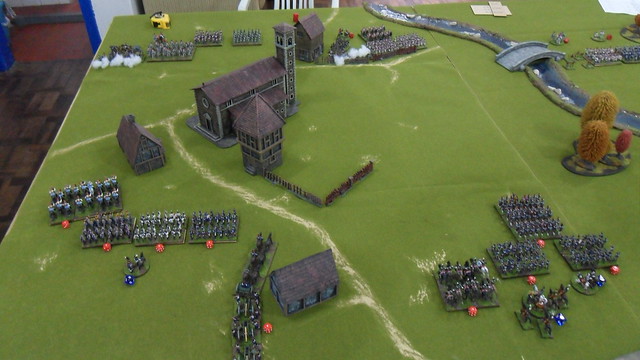
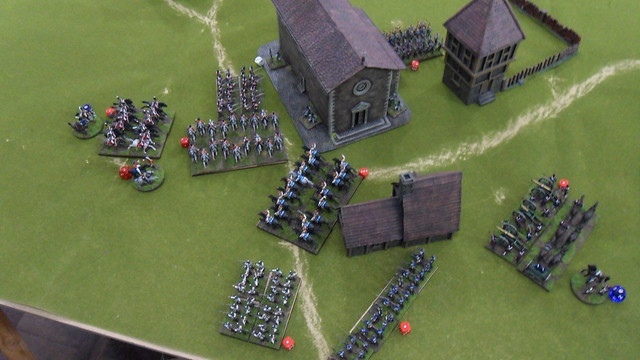
In the town, Brunswick infantry manage to seize the church and make a defensive instance there, using every available door and window to fire at french columns nearby. The italian and french line regiments try to keep their pace forward, but the enemy artillery threatens their position.
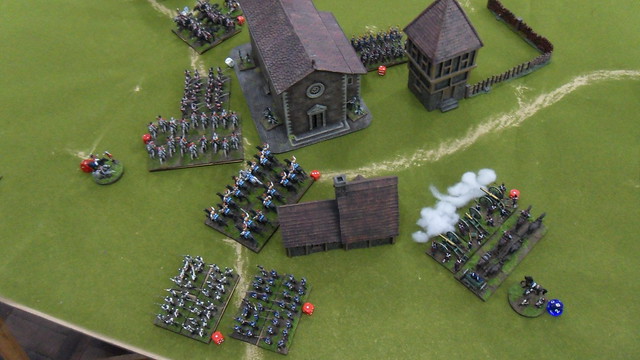
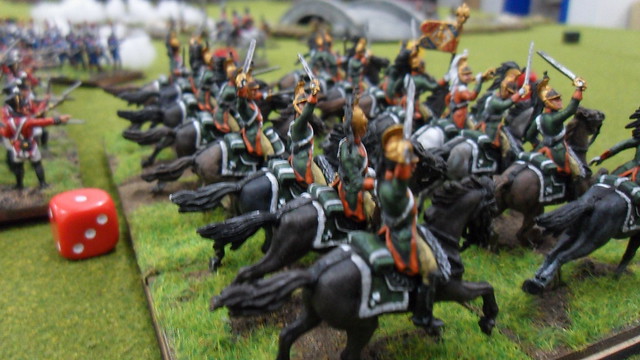
Here we have the first clash between the best cavalry units in both sides. The Scot Greys and the Carabiniers. They make contact for a moment, but immediatelly retire, both sides uwilling to commit to a wearing melee at this point. The french horse artillery is repositioned to pound over the church, in hopes of chasing off the german regiment garrisoned there.
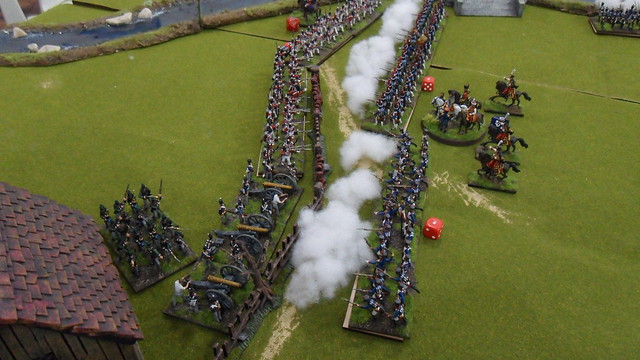
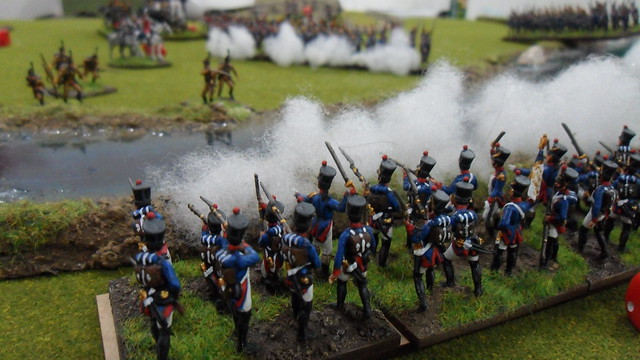
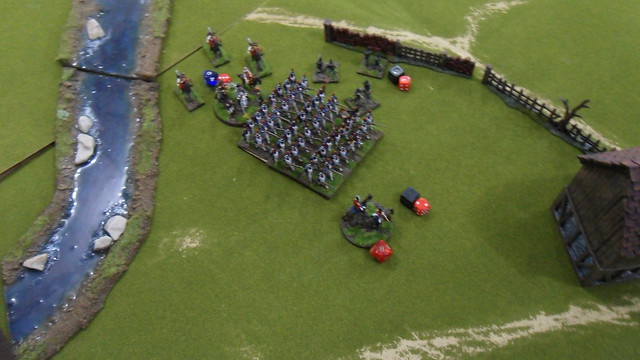
In the centre, the british lines, supported by their artillery, unload their guns heavily onto the french, at this point already very close to the enemy, and deploying in lines to avoing presenting easy targets to british batteries.
Napoleon himself leads the men in this close encounter, a very risky advance towards a well defended enemy position, where line infantry and cannons take cover behind fences and short stone walls.
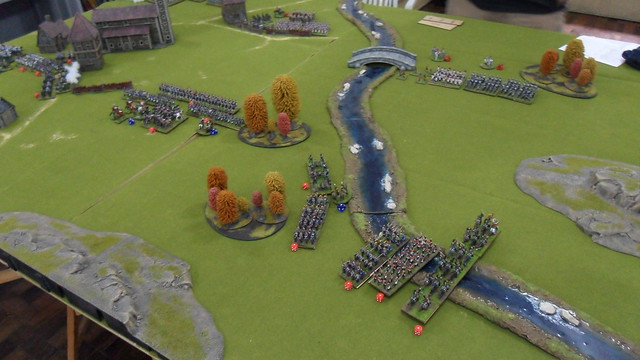
But such is the Emperor's confidence in his capacity to quickly sweep through the enemy positions that he sends aid to both flank brigades. To the left, the bavarian light cavalry is dispatched to neutralise the british horse artillery, thus allowing the italian and french lines to advance. To the right, a french line regiment maneuvers to enfilade the spanish line with volley after volley of drilled musket fire.
The exchange of musquet fire is intense in the centre. Dreadful screams of the dying echo amongst cries from officers urging their men to stay resolute. White clouds of smoke from gunfire surround all things, and further increase the mess and confusion in the area.
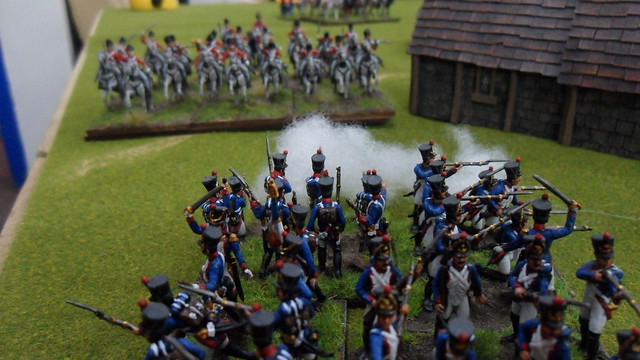
The british lines stand their ground, bravely facing the fearsome old guards. The british 95ºers try to maneuver past the firing lines to a suitable position where they can deploy in skirmish formation and punish the french ranks from behind.
The british lines stand their ground, bravely facing the fearsome old guards. The british 95ºers try to maneuver past the firing lines to a suitable position where they can deploy in skirmish formation and punish the french ranks from behind.
The iberian brigade starts to falter. A portuguese regiment breaks under intense artillery fire, and the spaniards are also at risk of routing. They are disordered, unable to move, and sustain musquet fire from accross the river bank, while whatching the french columns advancing mercylessly towards them. There is no hope of saving that flank now. Still, the portuguese general performs better than expected. If not inspired, at least he wasn't compromising the maneuvering of his units either.
The british centre was also at the brink of falling. The Old Guard reformed into attack column again and charged home a british line, who fled in despair when the white smoke dissipated a bit and they found themselves in the path of advancing french bayonets.
The second line regiment pivoted to bring its musquets to bear at the french grenadiers, but were charged in sequence by the Old Guard, who kept marching towards the enemy under the personal guidance of Emperor Bonaparte. Despite losses, nothing seemed able to stop that column of Imperial Guards, and they broke the second british line with equal ease.
This caused the english centre brigade to break, and the disordered artillery and the skirmishing rifles were all that was left to face the Guard and prevent it from marching to support the french left flank in the town nearby.
The british did succeed, however, at defeating a Line Regiment that was supporting the Guard, leaving the grenadiers to advance alone. The canister shots from the british cannons proved too much for the fusiliers, who lacked the value of their brother in arms, the Grenaiders of the guard.
Speaking of the town, the bavarians Napoleon sent to support the flank were quick to break the british horse artillery, but then, instead of retiring to a safe position, the general leading them chose to chase further glory by sticking around and prey upon any suitable targets, would they present themselves. Perhaps not a very bright idea, with the British Scot Greys standing so close.
The Old Guard in the centre scored its third kill by taking the enemy guns, by then a disordered and tired lot of artillerymen and burning-hot cannon barrels. The rifles kept firing at the french column all the way, but could barely make a dent on the enemy disposition to fight on.
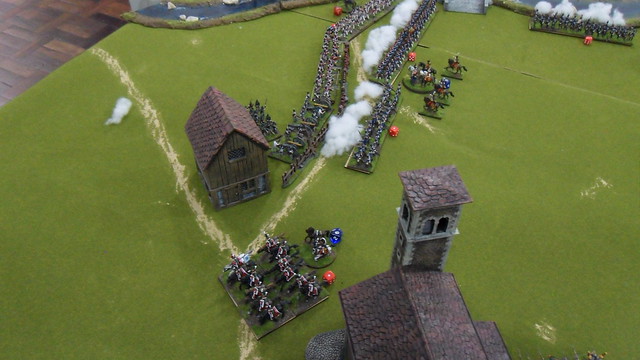
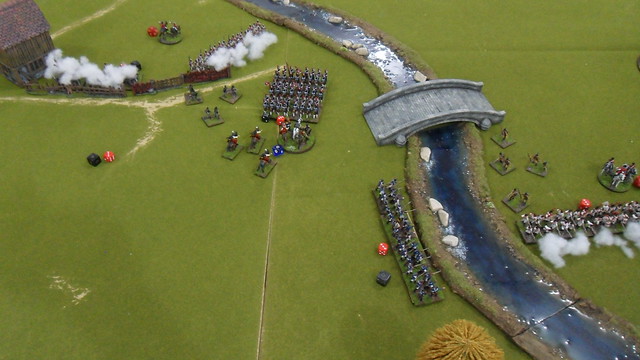
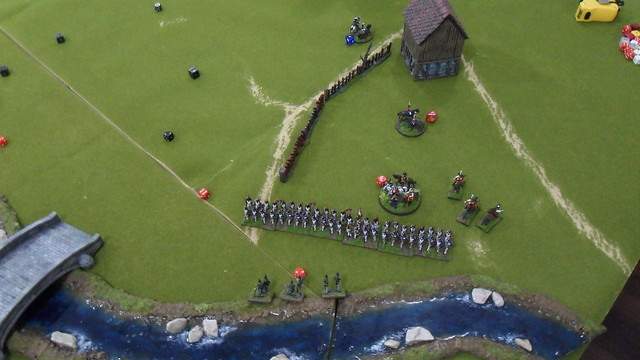
Below, we see the british left flank completely scattered. Only poor generalship prevented the french ranks from advancing and occupying the field.
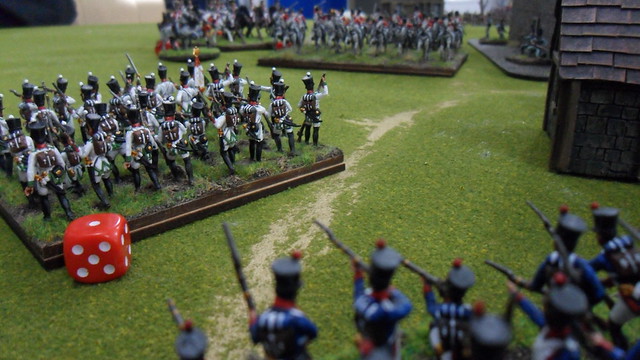
To further complicate a victory that could have been easier, the french centre brigade became broken due to accumulated losses when the last Line Regiment (in the left of the pic below) broke under the skirmish fire of the portuguese caçadores. Napoleon was right is assessing that he could afford to spare some units to the flanks and still take the centre, but he wasn't expecting those units to be unable to return in due time to reset his brigade to full order. This ended up costing the french a clear victory in the field.
The french Line Regiment, exausted and about to break to the fire of the portuguese caçadores.
The Scot Greys, now recovered from the clash with the Carabiniers early in the battle, are dispatched to hold the italian and french columns advancing to the far right. They manage to engage the italians to the flank and sweep through the enemy with relative ease. The french regiment close behind, however, manage to reform into square and hold the british horses' momentum.
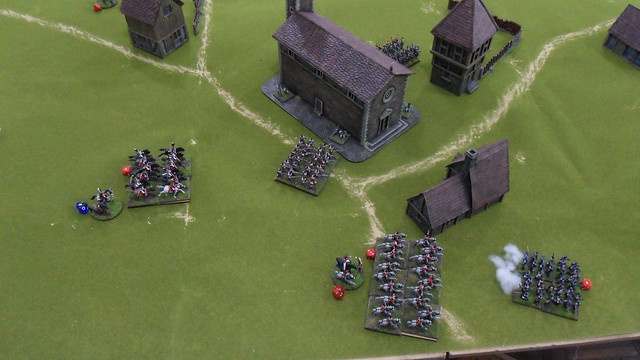
British Left flank in complete disarray, with french columns heading to cross the bridge and help finish off the enemy in the town:
The Old Guards seize the centre of the battlefiled completely, after destroying the enemy artillery in close quarters and shooting the 95º Rifles out of their sight.
The Scot Greys keep harassing the french square, but are still unable to prevail. On its rear, the bavarians charge home at a regiment of british light infantry, but being a small unit of light horses, prove unable to defeat the enemy and retire to a safe distance.
Up to this point, the French Dragoons where still unengaged. Their 3º brigade had already taken the flank, the british centre was devastated, and therefore they could only be of use in the opposite side of the table, in the town, but their commander was having trouble maneuvering his units among the remnants of the british units still skirmishing around, so it was unlikely they could traverse the entire battefield in time to be of any help.
The french square finnaly breaks to the british cavalry, and the french marshall of the 1º brigade was forced to commit the Carabiniers once again to a close fight with the Scot Greys. This round, however, proved decisive. The Carabiniers defeated the Greys and seized the field.
With its third brigade now broken, the british were spent. However, the french brigade in the town was also in poor condition, and the french victory was not as ample as it might have appeared.
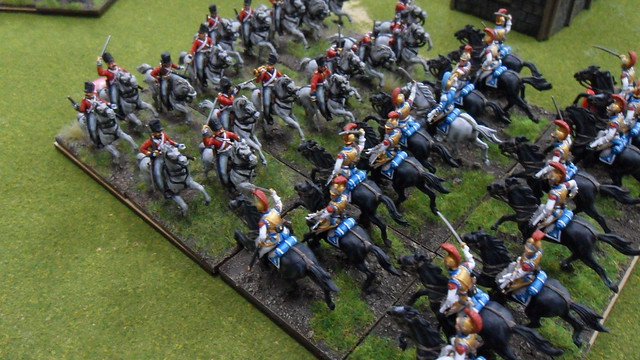
What a beautiful scene to behold! The light-grey british horses against the all-black french carabiniers.
Napoleon stands at the centre of the field, acclaimed by the victorious Old Guards. Two french brigades severely compromised, but a (close) victory was achieved, nevertheless.
*End of Transmission*
Great looking and close fought action. Our young Portuguese general also performed at least acceptably in his baptism of fire. Now he can have fun designing a new uniform for himself - extra lace optional!
ReplyDeleteYes, one the aspects I like the most about this ruleset is the spectrum of different command ratings for generals, and how this truly affects the perfomance of your troops in the field.
DeleteYou can trust a great commander to do complex maneuvers with his units very competently most of the time, while a mediochre one is hardly going to get his units to do a simple change of formation.
Great photos and write up. I have just two Spanish battalions at the moment but five on the painting table. Inspiring set up. Thanks for posting!
ReplyDelete